|
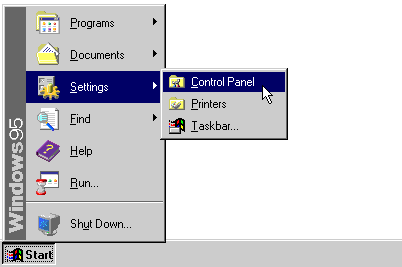
1. Select 'Control
Panel' from the 'Start' Menu
(XP looks a bit
different, but it works the same)
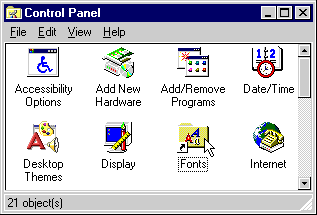
2. From the Control Panel open the Fonts folder.
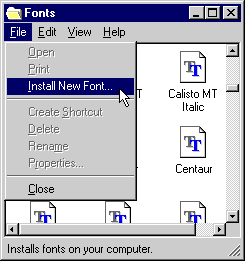
3. On the File menu, click Install New Font...
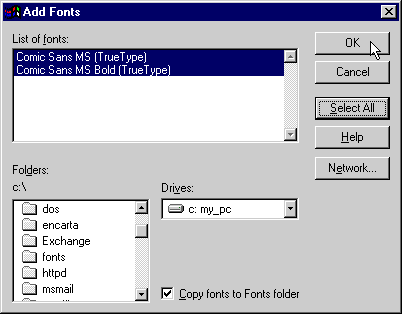
4. Click the drive and folder that contain the fonts you want to add.
Note: To select more than one font to add, press and hold down the CTRL key, click the fonts you want, then click on
OK.
Tips
To select a range of fonts in the list, press and hold down the SHIFT key while dragging the cursor over the fonts.
To add fonts from a network drive without using disk space on your computer, make sure Copy fonts to Fonts folder is not checked.
Still having problems installing the font?
Click
HERE for more help.
|

